The radio is held in with 4 clips. There is a specific Tool required to remove the radio.
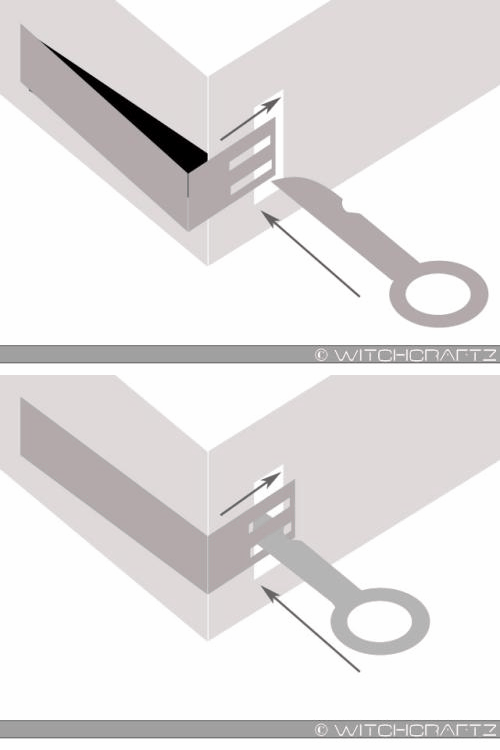
These clips are just a piece of metal that is bent at a 90 degree angle with little holes for your tool to catch. When you insert the Tool, the idea is the tool goes into the holes, pushes against the inside edge, and pulls the clips inwards, releasing the radio.
Here is a basic animation I made depicting how it works.
Pictures
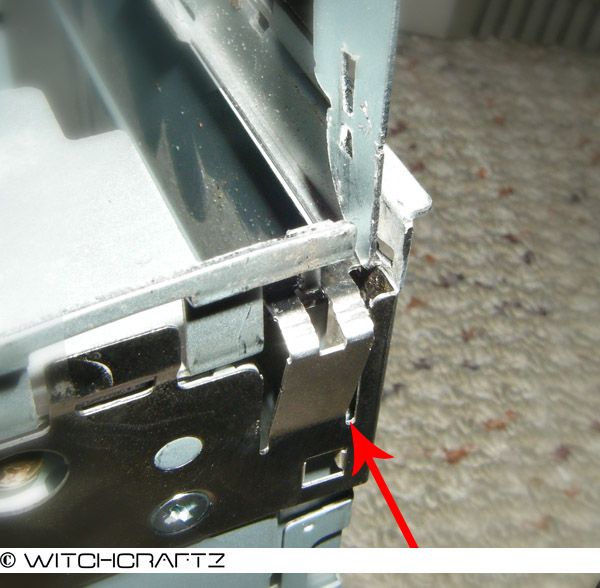
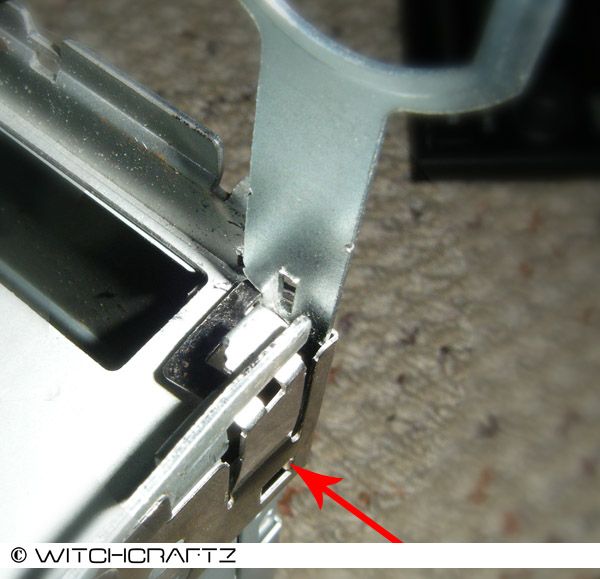
If your Stock/OEM radio is stuck:
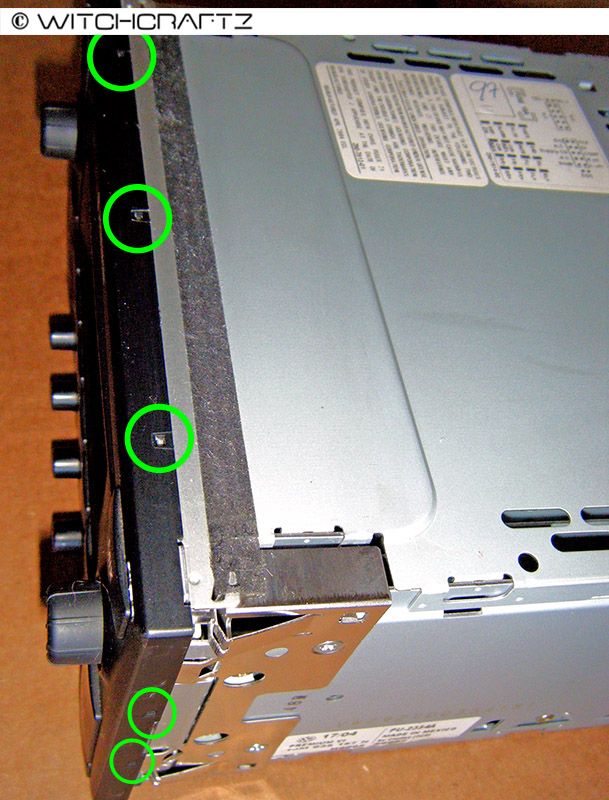
You probably bent one of the clips and it's not moving in anymore. With the unit still inside, the face of the radio can be easily removed with a small screwdriver and carefully working your way around in a circle, keep going at it slowly and the face should just pop off. There are 3 tabs on the top and bottom, and 2 on each side, the tab locations are circled in green. Be careful and slow.
Picture of the faceplate tabs on the outside of the radio:
Circled in red is the radio connector to the faceplate, be careful to removing and putting the faceplate on, these thin metal tabs have to go perfectly into their slots or you could damage your radio.
Picture of the radio with the face removed:
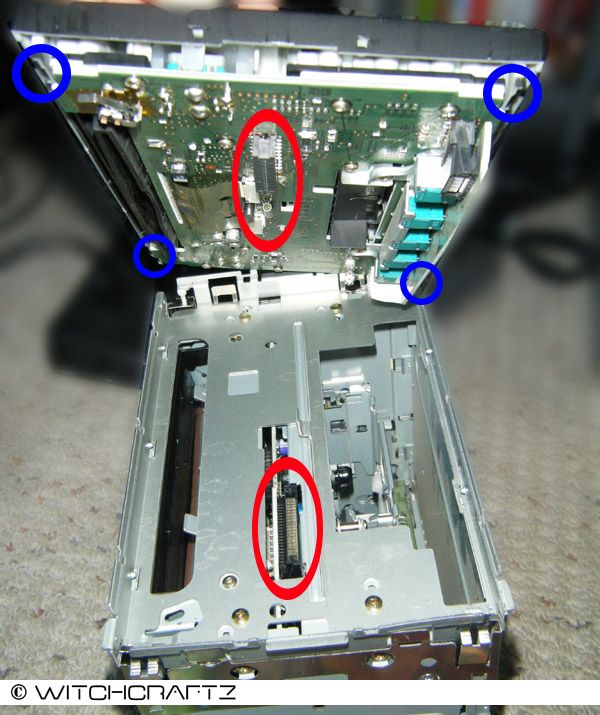
With the front removed you can use a the screwdriver and/or small pliers to pull the clips inwards and release the radio.
NOTE: if you have a couple of screwdrivers you can remove the radio using this method without requiring the special tools.
Or you can make your own tool, print this image on a paper and make sure it is 5cm long when printed (should already be done for you but double check). Transfer to a card and use the outline to cut out your own set of Radio tool keys.
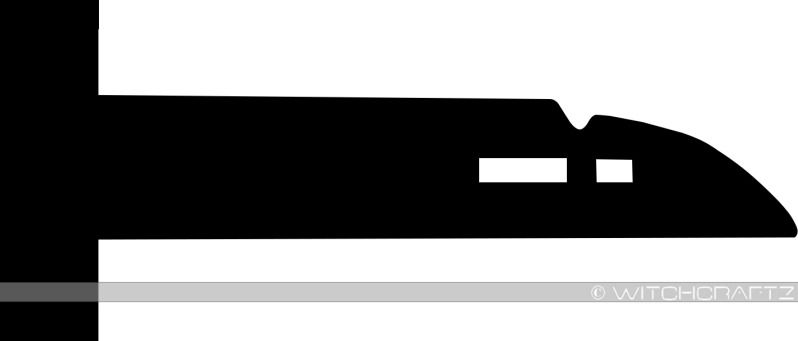
These clips are just a piece of metal that is bent at a 90 degree angle with little holes for your tool to catch. When you insert the Tool, the idea is the tool goes into the holes, pushes against the inside edge, and pulls the clips inwards, releasing the radio.
Here is a basic animation I made depicting how it works.

Pictures


If your Stock/OEM radio is stuck:
You probably bent one of the clips and it's not moving in anymore. With the unit still inside, the face of the radio can be easily removed with a small screwdriver and carefully working your way around in a circle, keep going at it slowly and the face should just pop off. There are 3 tabs on the top and bottom, and 2 on each side, the tab locations are circled in green. Be careful and slow.
Picture of the faceplate tabs on the outside of the radio:

Circled in red is the radio connector to the faceplate, be careful to removing and putting the faceplate on, these thin metal tabs have to go perfectly into their slots or you could damage your radio.
Picture of the radio with the face removed:

With the front removed you can use a the screwdriver and/or small pliers to pull the clips inwards and release the radio.
NOTE: if you have a couple of screwdrivers you can remove the radio using this method without requiring the special tools.
Or you can make your own tool, print this image on a paper and make sure it is 5cm long when printed (should already be done for you but double check). Transfer to a card and use the outline to cut out your own set of Radio tool keys.


Comment